
Why the CS-Lite color modes are important for camera scanning
Posted by Brandon Wright on


When camera scanning color negative film, getting great color can be a bit of a challenge, even when using a high CRI light source and excellent software like Negative Lab Pro or FilmLab. The real secret to a workable camera scan is getting a good initial capture in camera so that you don’t have to push or stretch the file more than it's bit depth or the software can handle. This means getting an appropriate exposure and color balance at the moment of capture.
With the new CS-LITE, there are 3 color modes built in: Warm for slides, White for black and white film, and Cool mode for color negatives. So for this post, we’re putting all 3 color modes to the test to show you the difference.
This first set of examples is what your capture will look like with the three different color modes when you set your white balance to the coolest setting at 2000 kelvin.
Raw Capture Cool | White | Warm
The Cool mode is most important for color negatives and the CS-LITE is the only light source on the market that offers anything like it. As you can see, even when you pin your color temp to 2000 kelvin, if that’s the minimum that the camera white balance can be set to, only the Cool light mode actually renders any perceivable blues, meaning that the blue channel of the sensor is underexposed and then for the White and Warm modes, the red is overexposed. Without pushing the file with fancy post work, you will never be able to get a good inversion to a positive and you will introduce noise and gaps in the blue channel with color contrast issues.
Due to the orange mask which is present when scanning color negatives, using any other scanning light source (or our CS-LITE set to the White light mode), you will need to do more than just invert the negative with added contrast and adjust color temperature further for good color, resulting in the need to use the fringes of what the sensors is capable of recording, similar to underexposing or blowing your highlights by overexposing your capture, but only in one or two color channels. RAW files are fantastic if you miss exposure a little bit, but there are limits. For example, you don’t want to underexpose your capture too much or you will see a lot of noise and contrast and color will be hard to control.
I didn’t get very far with these in Lightroom using only white balance (all at the minimum 2000 kelvin and appropriate tint adjustment), added contrast and a custom Tone Curve (using a neutral 4-point s-curve for more contrast and inverted RG&B Channel 3-point curves with no added contrast, just a midpoint to adjust color) just to see what we could get using minimal adjustments to convert.
Inverted with LR Curves Cool | White | Warm
It needed hardly any RGB midpoint correction to adjust for the Cool setting and likely only because this was 800T in open shade, otherwise I would have been able to correct color using only white balance if it were shot on 400D or with an 85 warming filter on the lens. It is very apparent that the White and Warm light modes require quite a bit more adjustment, even when adjusting the RGB midpoints in tone curves.
So next I tried further adjusting the white, black and mid-tone points on the RG&B curve channels in an attempt to eliminate any color cast.
Color Corrected with LR RGB Curves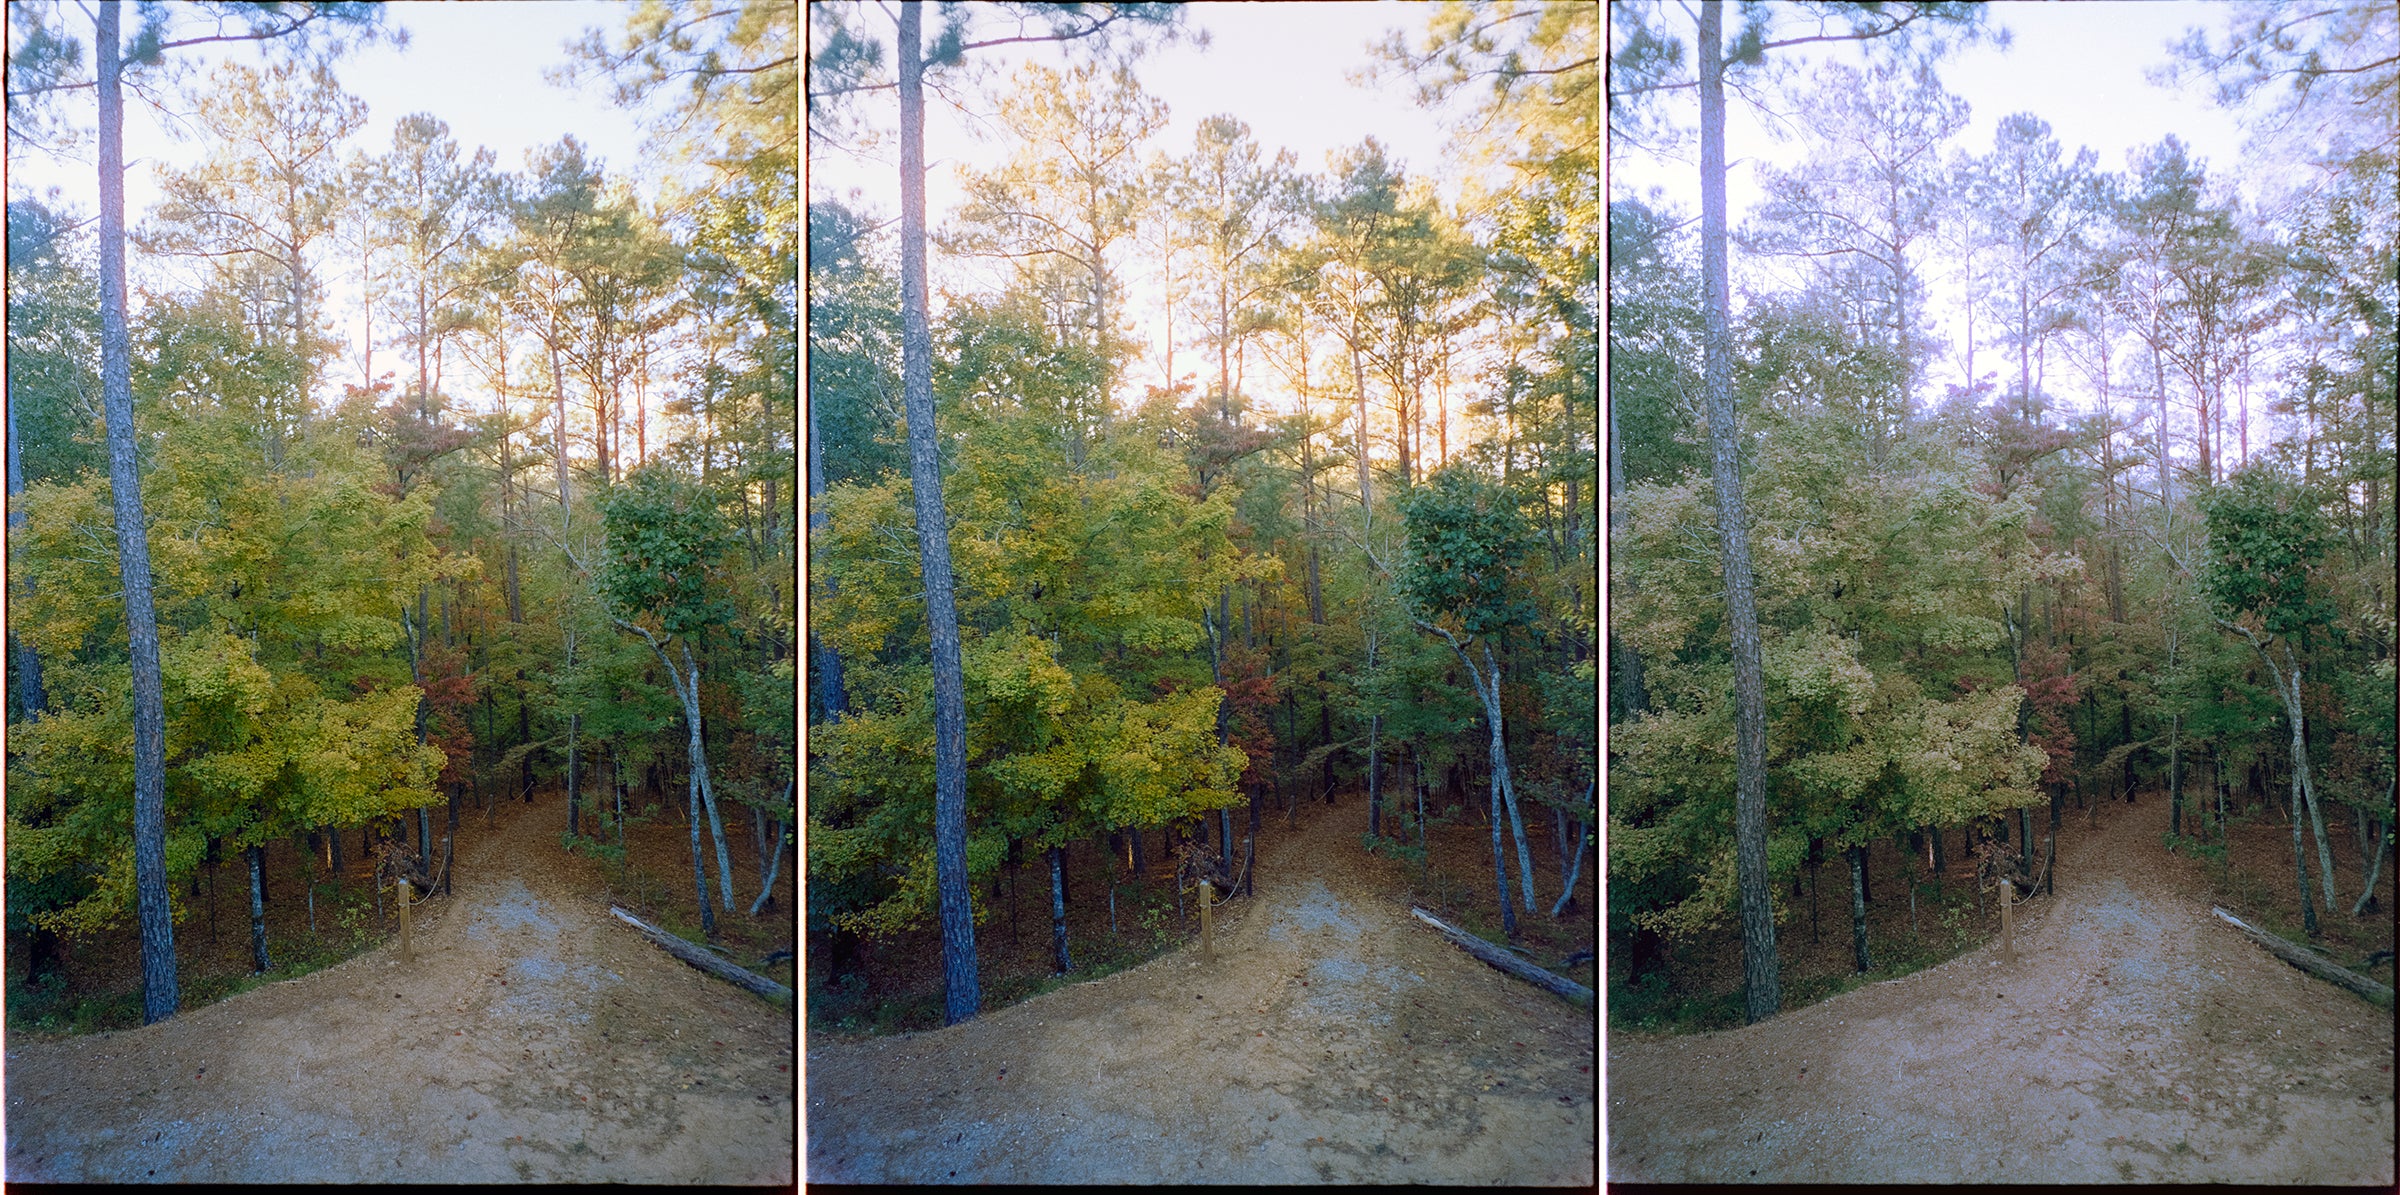 Cool | White | Warm
Raw CaptureCool | White | Warm
I then inverted the negatives straight with no other adjustments in Photoshop.
Inverted in PS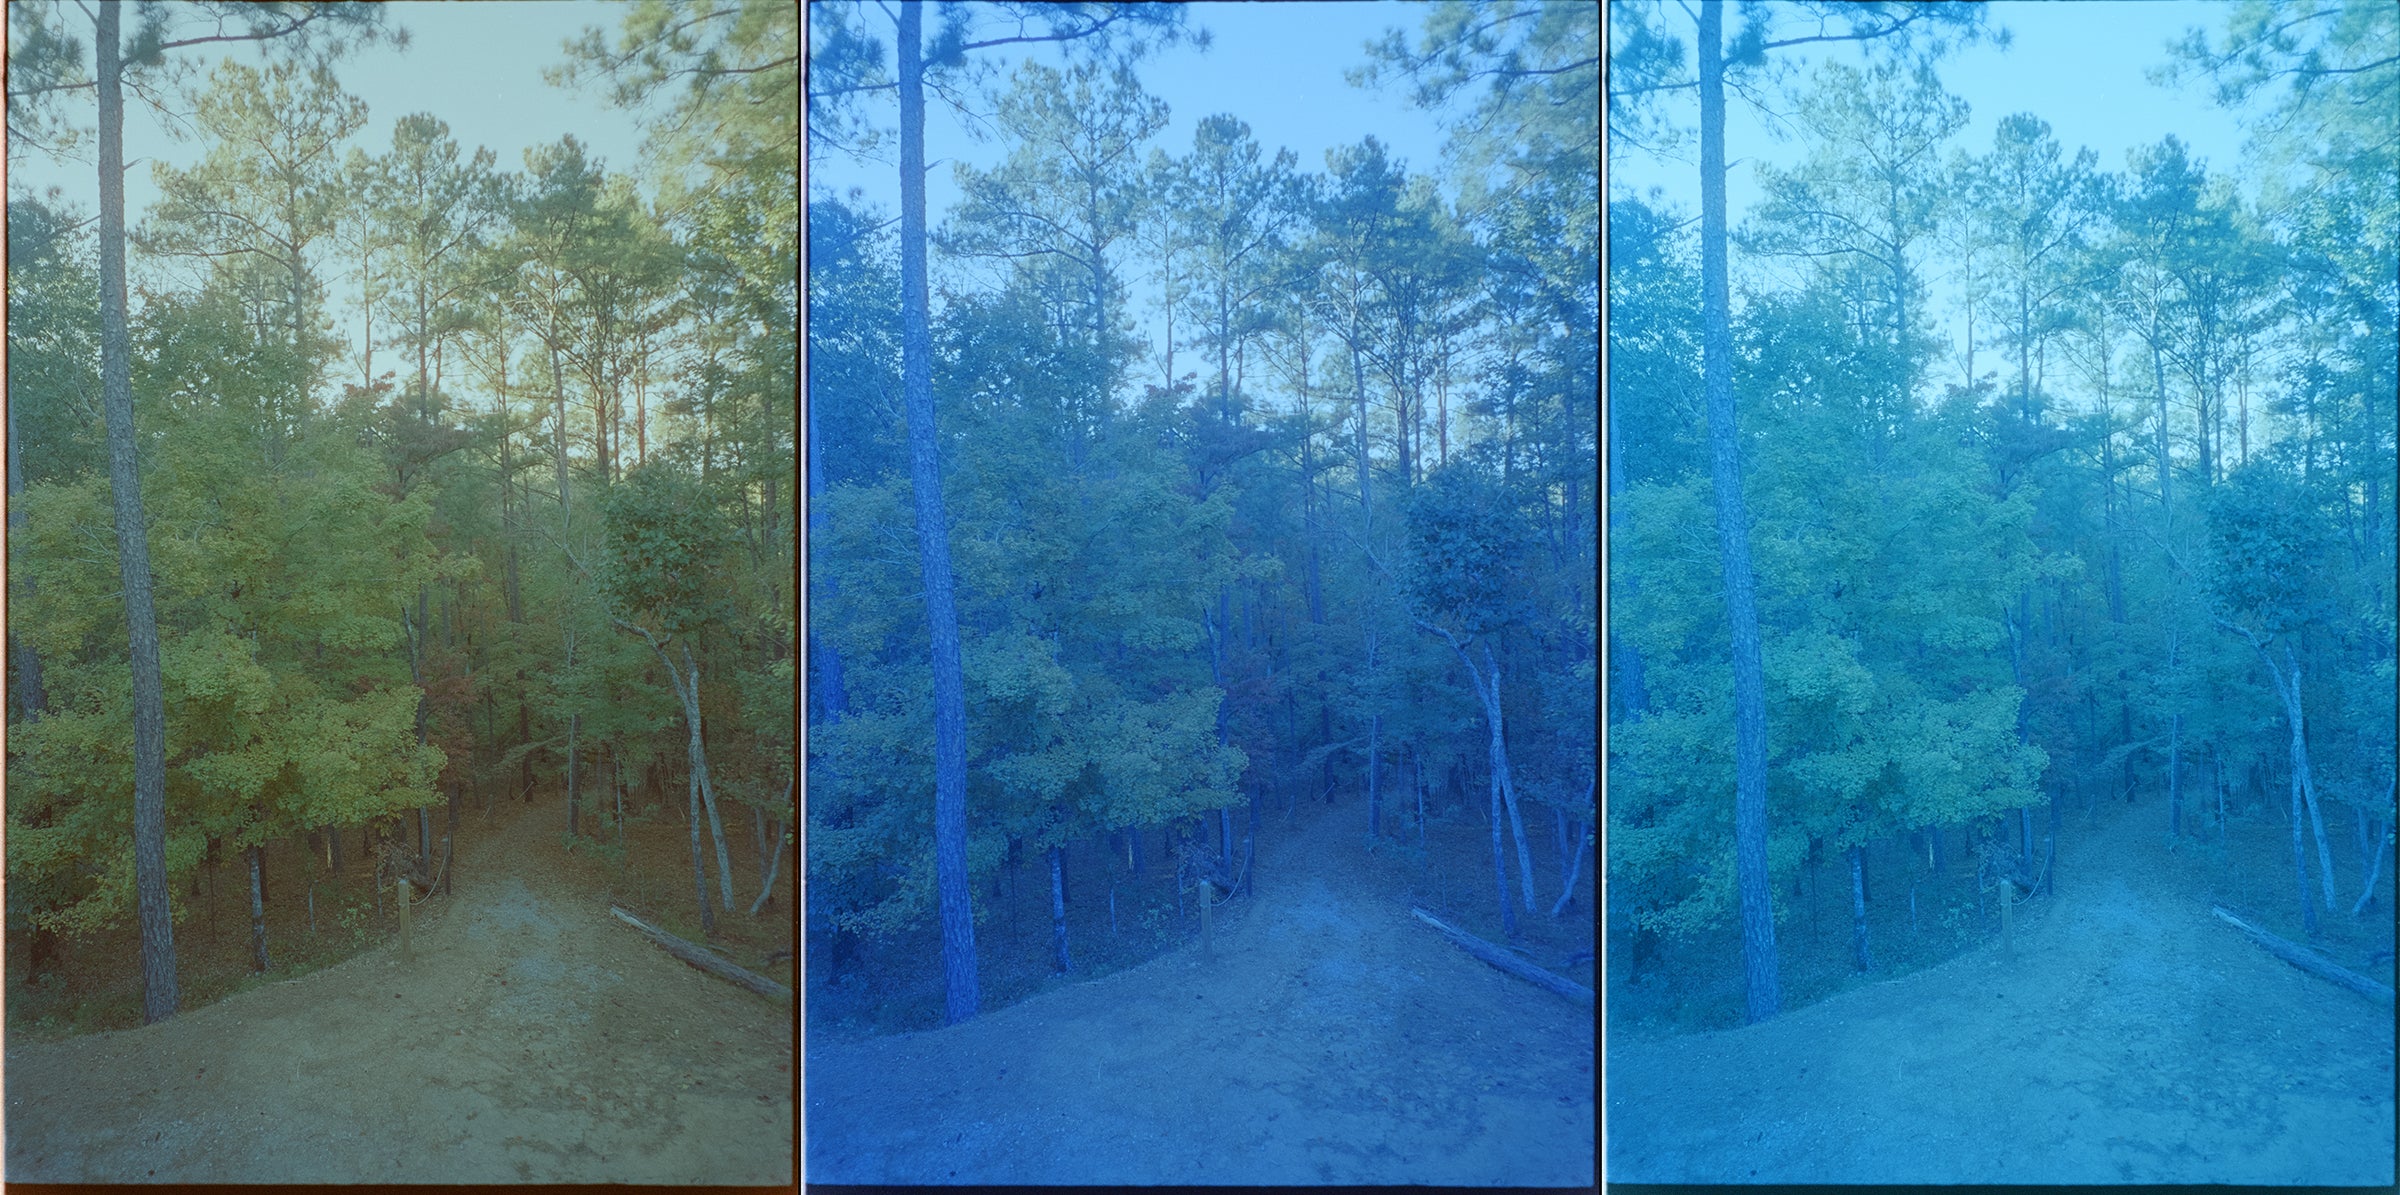 Cool | White | Warm
These are the warmest SOOC (straight out of camera) inversions possible, so next I added a mild s-curve layer for contrast and color balanced each mode by eye to attempt to match color.
Color Corrected with PS RGB Curves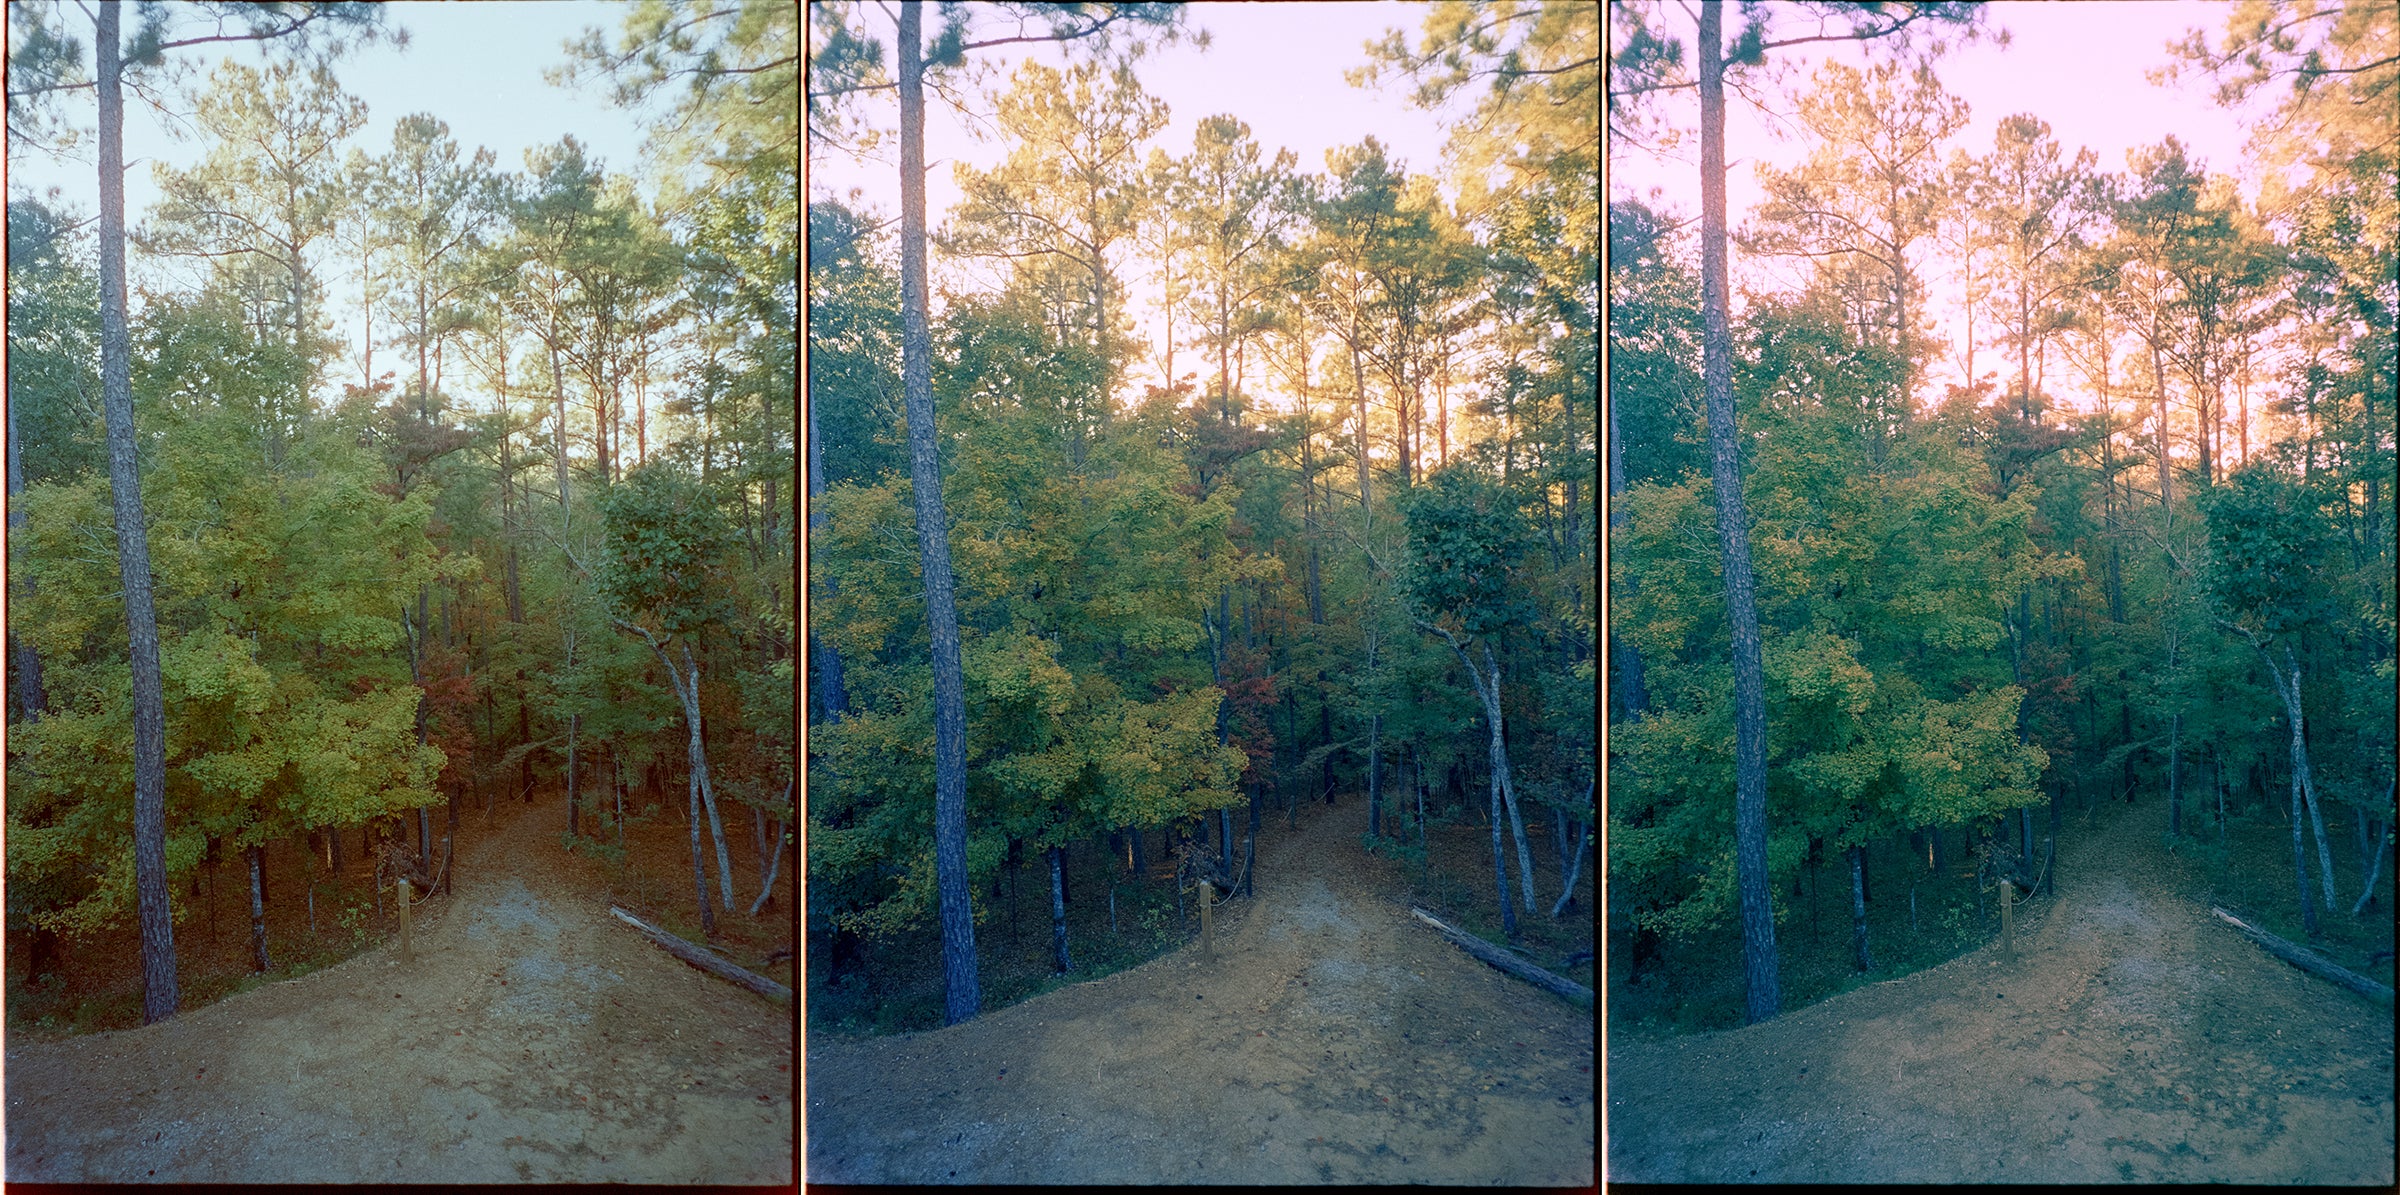 Cool | White | Warm
Similar to my most basic attempt in Lightroom, with way too much color cast on White and Warm modes, you can see how the Cool mode of the CS-LITE is already nearly there. So I went back to the flat SOOC inversion and tried for a more automated process by applying Photoshop’s Auto Tone (command+shift+L) and then Auto Color (command+shift+B) tools, to see if it could fix the color cast, and kept the s-curve for contrast.
Auto Corrected with PS Cool | White | Warm
Great workflow, but not acceptable on anything but the Cool setting. On all of these so far, the White light mode (same color temperature as is used with all other light panels and film scanning lights) and the Warm light mode could not even come close to normal colors with heavy color cast, while only the Cool light mode has had consistent flattering results. This is why we have always NEEDED a good software plugin like Negative Lab Pro to analyze and tweak camera scans, prior to the CS-LITE’s Cool mode.
So, how do the different color modes work when using Negative Lab Pro? Thought you would never ask!
NLP Conversion in LR Cool | White | Warm
As you can see, NLP does a fantastic job trying to match the colors and was much faster than manually adjusting the curves but anything except the Cool light mode introduces color cast (very noticeable in the bottom left corner, in the bark of the big tree in the foreground, and in the sky) and inferior color separation (visible in the foliage and fallen leaves).
Long story short, neutral color balance matters at all stages of color photography (not just shooting 800T in low light) and if you can keep your white balance somewhere nearer the middle of native, you will get more to work with in your digital conversion.
Share this post
- 1 comment
- Tags: color, color photography, comparison, CS-Lite, scanning, tests
Fantastic demonstration. You all should do a video version of this as well for increased visibility. You could also add a multi-exposure shot to show if you can somewhat overcome the lack of blue light reaching the sensor with a white light source. Still worse than just buying the right light source, but would be a good value add for the community. I’m gonna go run my own tests tonight with Aerocolor IV, 800T (which I felt always looked like crap on my Nikon scanners) and some Gold 200 on my GFX + Valoi/Cinestill setup.
No idea why this info isn’t more widely publicized.